There are times whereby the usual dabs of concealer and cream blush for that everyday no-makeup makeup look just ain’t enough. While there are certainly NO RULES or expectations when it comes to makeup, it never hurts to have a foolproof full-coverage routine to fall back on.
These full face makeup steps are for days when you feel like kicking things up a few notches or for that look you’ve been saving up on for special occasions. Rest assured, we’ve taken Singapore’s heat and humidity into consideration when crafting this so you can put your summer makeup-melt fears aside.
This step-by-step tutorial will cover essentially everything – from primer to lipstick to beauty tools – for that ultra glowy soft glam look that’s perfect for a night out. And the best part? All products featured here can be easily found without a hefty price tag so you can look snatched without busting the bag!
Steps for full-face makeup on face

Before you go ahead and beat on a face-full of makeup, it’s vital to have your skin prepped and ready to start absorbing all that you’re applying to it. Not only does proper pre-makeup skincare ensure products go on more seamlessly, it also helps with long-lasting wear and allows you to achieve the flawless air-brushed finish we’re all after.
While we’re seeing an increase in the number of skincare-infused makeup products, it’s still important to note that some makeup products do have the tendency to suck moisture and any semblance of life out of your skin resulting in dull, uneven skin tone – especially with long-wear!
So always make sure you’re cleansed, exfoliated, and loaded up on hydration prior to embarking on a full-coverage look. Remember to be patient and allow products to really sink in for maximum absorption. Then we’re off to the first step!
Step 1: Primer
Think of priming as an extension of skin prep. Instead of softening your skin like your favourite moisturiser does, primer acts as a protective barrier between your skin and makeup, providing a “grip” for subsequent products to cling on to. A double-sided tape of sorts.
This is especially important in Singapore where excess heat might cause makeup to slide around the skin resulting in, well… a mess.
Primers are available in various formulas (cream, gel, powder) with a myriad of functions depending on what your skin needs.
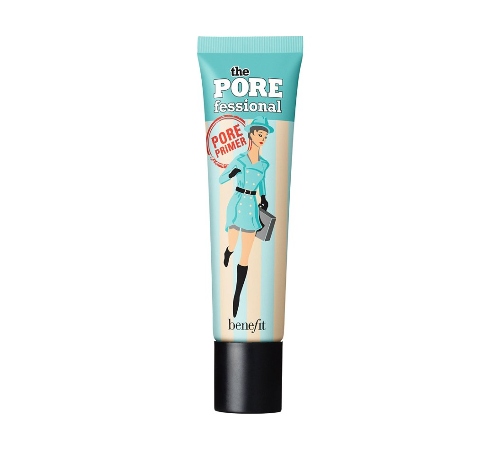
Benefit Cosmetics The POREfessional Face Primer Cult-favourite
If you’re looking to smooth out fine lines, wrinkles, and blur out large pores, crowd-favourite The POREfessional Face Primer is your guy.
This silicone-based primer fills in pores for a silky surface while mattifying oily skin to keep makeup crease-free all day.
Retails for S$56 (22ml). Click on the link below to check for latest promotions.

NYX Professional Makeup Studio Perfect Primer
Struggling to cover up redness from irritation or acne? Colour-correcting is the answer for a perfect-looking complexion. If you remember back from kindergarten school days, green sits opposite red on the colour wheel meaning these two colours effectively cancel each other out when layered on.
It’s best to reach out for a green colour-corrector when dealing with redness, which is why we’re recommending this primer.
Lightweight and fast-absorbing, this is a must-have to easily camouflage surface imperfections and maximise makeup longevity. Dab this on acne spots or flare-ups to conceal effortlessly.
Retails for S$19. Also available in clear and lavender shades.
If you’re looking for more options, check out the best primers of 2021 as voted by our judges, experts and Daily Vanity readers.
How to apply primer: ditch the brush!
While this depends on your choice of formula, it’s safe to say that primers are best applied with fingers. This allows the primer to heat up slightly and dissolve well into the skin.
Starting from the centre of your face, in the nose region, gently work your way outwards towards the cheeks and forehead. You do not want to rub the product in like you do with cleansers but rather, pat lightly until zero residue is left behind.
Wait a minute or two for everything to dry completely before carrying on with the next step, if not, you’ll be totally negating the effects of a primer – thank us later.
Step 2: Foundation
Used to even out skin tone for the creation of a more uniformed complexion, foundation is like a distant relative to the tinted moisturiser, typically providing a tad bit more coverage.
Foundation comes in both liquid and powder forms but for an ultra glam look, we’ll be going with a liquid form as these tend to cover up better. If you haven’t picked out your shade, check out this comprehensive video below.
If you’re curious to find out how Sephora is doing in-store shade matching in this time where social distancing should be adhered to, read about it here.

Maybelline Fit Me Dewy + Smooth Foundation
For normal to dry skin, you might want to give this foundation a try. Achieve a natural luminous finish while keeping rough and dry patches in check with this ultra-moisturising formula that goes on smoothly for a glowy look.
Retails between S$19.90 and S$21.90. Click on the links to compare prices.

Revlon ColorStay Foundation
If you have combination to oily skin, you’ll definitely love this foundation. This oil-free product contains salicylic acid that unplugs dead skin cells and controls excess sebum production for a 24/7 matte look no matter the time since application.
Retails for S$33.90 and comes in 35 shades. Click on the links to compare prices.
How to apply foundation
Although we’re going for a full coverage look, start with just a pea-sized amount as most liquid foundations can be built-upon if you’re in need of more coverage.
As a good rule of thumb, apply the first layer and let it settle in for a bit before deciding whether you need another. This way, you’ll easily avoid a cakey look and not have to waste product.
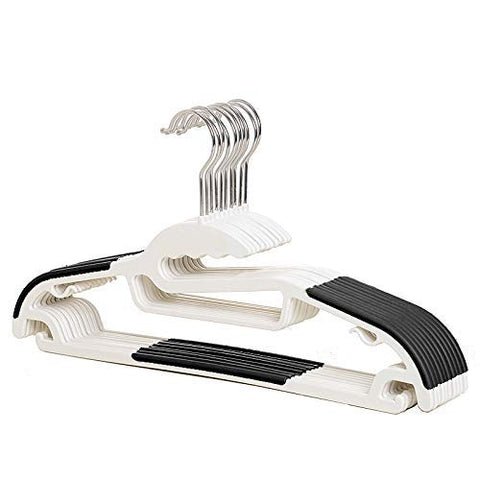
Use a damp sponge to dab foundation into skin starting from the centre of your face – the Beautyblender (S$32) is a cult-favourite. But why a damp one? This prevents the sponge from eating up excess product and makes it easier to blend afterwards. Simply spritz your makeup sponge with some hydrating mist or run it under warm water and wring out any excess.
For foundation, it’s best to set brushes aside as bristles might leave streaky lines down the face. Fingers, on the other hand (no pun intended), tend to miss out on hard-to-reach areas.
Check that you bring the sponge up into the hair line, around the jawline, and down the neck as well!
Step 3: Concealer
Surely everyone would have heard of concealer. This ride-or-die product is both our secret to having “nine hours of complete rest” and infant-like, trauma-free skin.
Concealer comes in high coverage (cream, stick), medium-to-high coverage (pencil, liquid), and light coverage (pen with brush tip) formulas that tend to be more pigmented than foundations.
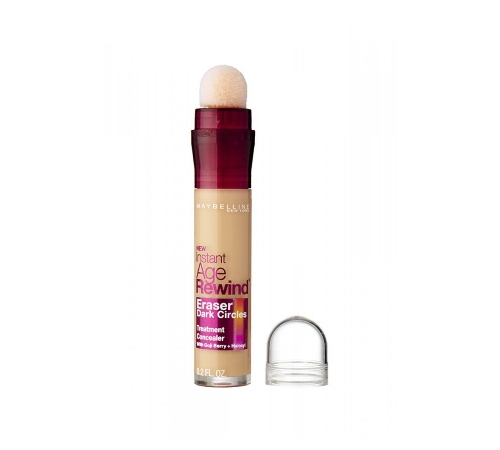
Maybelline Instant Age Rewind Concealer Cult-favourite
For dry skin, this concealer promises well-hydrated under eyes that brighten up instantly in a swipe.
You’re also going to love its lightweight texture and how it blurs out imperfections.
Retails for S$19.90. Click on the links to compare prices.

L'Oreal Paris Infallible Full Wear Concealer
This concealer works best for oily skin types, keeping skin matte and shine-free.
Take note, though; reviewers have warned to keep powdering to a minimum as this drying concealer has the potential to expose fine lines when worn on for too long.
Retails for S$21.90. Click on the links to compare prices.
How to apply concealer
When applying concealer to the under eye, avoid dotting or sweeping it directly under your lower lash line and onto your eye bags as this might cause an accidental highlight which draws even greater attention to your panda eyes – yikes!
What you want to do instead is create an inverted triangle with the V extending downwards to your cheek area. This helps to subtly brighten up the under eye area and give your cheeks a bit of a lift at the same time.
Colour-correcting concealers can erase redness and dark spots left behind by zits or scars. Blend well using a beauty sponge or brush – but remember to never drag it!
TIP! It’s natural to use two different shades of concealer at any one time as different parts of the face will require different forms of correction. For the under eye area in particular, choose a shade that’s no more than one or two shades lighter than your natural skin tone.
Step 4: Bronzer
Now that we’re done with our base, it’s time to add some of the colour that’s been taken away with the previous steps – as contradictory as it sounds… it works! To start, add a little warmth with a natural-looking bronzer that matches your undertone.
Here’s the cheat code: if you have cool undertones, avoid red-toned bronzers at all costs and instead, stick to more neutral or peach shades. If you’re warm toned, give golden brown bronzers a try for the maximum glowy sun-kissed look. Neutral undertones have the best of both worlds.
Don’t be afraid to try our bronzers that contain shimmer! These make the best glistening look for a glam evening out. If your skin is on the oily side, do check that the reflective particles in your product are fine enough to pass off as glitter and NOT oil in direct lighting. However, if you’re still unsure, it’s totally fine to opt for a matte bronzer!

Benefit Cosmetics Hoola Matte Bronzer
We’re loving the iconic bronzer that seems to work on all skin types. This universally-flattering product is adored by MUA and celebrities alike and you’ll love the matte finish it delivers to make sure it stays on your skin all day while making sure you look shine-free.
Retails for S$30. Click on the link below to check for promotions.
How to apply bronzer
The idea with bronzer is you want to hit all the areas your face naturally catches a tan on. This means the bridge of your nose, cheekbones, and the top of your forehead.
TIP! It’s easy to muddle up this part as bronzers tend to show up fairly well on skin. Pick a fluffy brush, dust off any excess powder, and glide it around quickly. Bronzer should show up in a lightly diffused manner and not in concentrated spots.
Here’s a great video you can follow to learn how to apply bronzer.
Step 5: Contour & highlight
Spoiler alert! Contour is NOT the same as bronzer. While bronzing adds dimension and heat to our skin, the point of contour is to sculpt your face by going into the bone structure to enhance the natural features.
Compared to bronzing, contouring requires a lot more precision which can be rather daunting for the beginner. But as we all know, practice makes perfect, so get to work for those sky-high cheekbones.
Highlighting, on the flip side, is about bringing focus to the high points of your face to make them pop. This step is for everyone and when we say everyone, we mean that literally everybody can afford a strobe or two for a more illuminated look, full-face coverage or not.
However, for folks with oily skin, be careful when choosing highlights that can make you seem greasier than you already are.

Charlotte Tilbury Filmstar Bronze & Glow
We’ve been loving this kit because it has everything you need to create the perfectly contoured and highlighted complexion.
The finishes are natural-looking to help you achieve the red-carpet-ready look in no time.
Retails for S$105. Click on the link below to check for promotions.
How to apply contour & highlight
Here’s good news: we’ve created a step-by-step guide on how to contour and highlight if you’re a beginner (in seven easy steps!)
Check out the link above for details.
Step 6: Blush
Blush is an important part of a full-coverage makeup look because it gives your skin a rosy appearance and an instant glow.
If you prefer a dewy look, go for a cream blush and if you have oily skin that sees your makeup budging by midday, consider a powder blush.
How to apply blush
Generally, you’d want to avoid blending in blush too much since these are meant to show up as pops of colour for that radiant flush.
- If you have a round face: Apply the blush along cheekbones and extend it out to temples for a slimming effect
- If you have a wide forehead: Sweep the blush below the meatiest parts of your cheeks and blend it right out into your hairline to balance out your width
- If you have a long face: Blend the blush beneath the meatiest parts of your cheeks, and avoid extending it to the temples
Watch these two videos to learn more about blush placement below.
Steps for full-face makeup for eyes
Step 1: Eyeshadow primer
Similar to base makeup, you’ll want to use an eye primer to help create a smooth canvas for a seamless glides on and for your wash of colour to last all day. A primer also helps pigments stick well to lids (especially oily ones!), preventing any fallout that can transform your cheek into a mid-day circus spectacle.
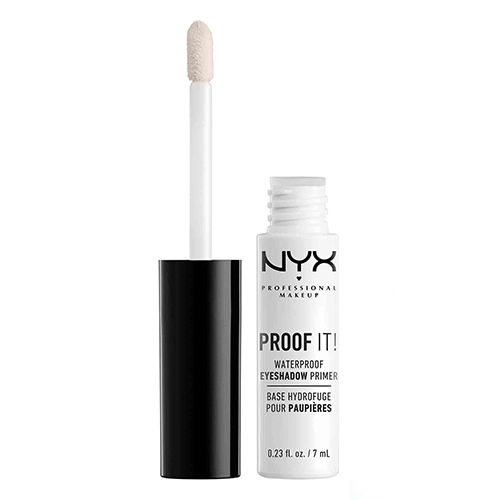
NYX Waterproof Eyeshadow Primer
For a budge-proof look that stands well against Singapore’s sweltering days and even water, try this affordable but well-loved primer.
Besides making sure your eyeshadow lasts for a longer time, its formula also intensifies the pigments in your eyeshadow so your look can show up more vividly.
Retails for S$11. Click on the link to check for latest promotions.
TIP! Pick a nude or white toned primer if you’re looking to apply colourful hues as some primers might contain natural pigments that obscure certain shadows.
How to use eyeshadow primer
Just like regular primer, it’s best to tap eyeshadow primer onto lids with fingers. Work the formula from the lash line to the entire lid. If you’ve got any excess, you can even bring it up to your brows to help makeup last longer there!
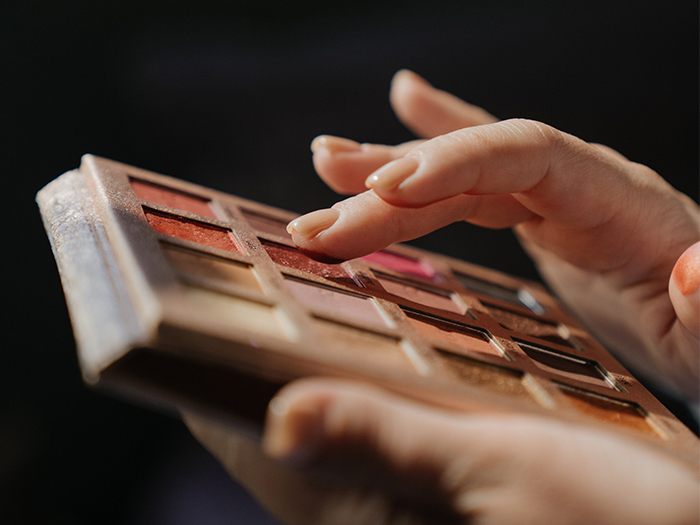
Step 2: Eyeshadow
So you’ve made it this far into the full face makeup look unfazed, the bad news is that the following step might be the make-or-break to your entire evening glam. But fret not, we all start somewhere.
When starting out, brown is traditionally regarded as the safest and easiest colour to pull off, because of how wearable it is for a daily look and how it flatters most skin tones so it won’t be as intimidating to use.
We’ve curated a list of 17 best eyeshadow palettes for beginners to easily create beautiful looks with without pro techniques. You’ll definitely find something that’s up your alley!
How to apply eyeshadow
We’ve created a step-by-step guide to bring you through how to apply eyeshadow for beginners. We also have a beginner-friendly guide on how to create the smokey eye look too.
Step 3: Eyeliner
Another slightly more technical step that requires practice to get right. When done properly, the eyeliner can elongate eyes and create the illusion of a thicker lash base for a sultry look.
It’s important to choose the right formula for your makeup needs.
- For long-wear & precision: Gel liners dry well and are typically budge-proof
- For intense pigment: Liquid liners can create a dramatic cat eye but you’ll need steady hands for them!
- For a smokey look: Pencils work best for a stunning smudged out look and give more control to beginners too
How to apply eyeliner
Psst, here’s a shameless plug before we continue with this article. Daily Vanity has just joined Tik Tok recently – you can follow us here! Here’s a fun eyeliner hack we recently did:
@dailyvanityWith these simple hacks, drawing winged eyeliner has never been easier! Stay tuned for part 2 ? ##eyeliner##hack##fyp♬ Dynamite – BTS
We’ve also created a step-by-step guide to help beginners learn how to apply eyeliner. It includes hacks and tips that will help any makeup rookie get this step right – we also made sure it’s applicable to those with hooded eyelids and monolids!
Step 4: Mascara
Mascara can give you a major upgrade and the best thing is, you can darken, curl, thicken, and lengthen your lashes easily to create any illusion you’d like.

Benefit They're Real Lengthening Mascara
For long voluminous lashes, consider this mascara, which comes with unique bristles that deliver length and curls from base to tip.
Its smudge-proof formula also ensures your lashes hold up in humid weather.
Retails for S$44. Click on the link to check for promotions.
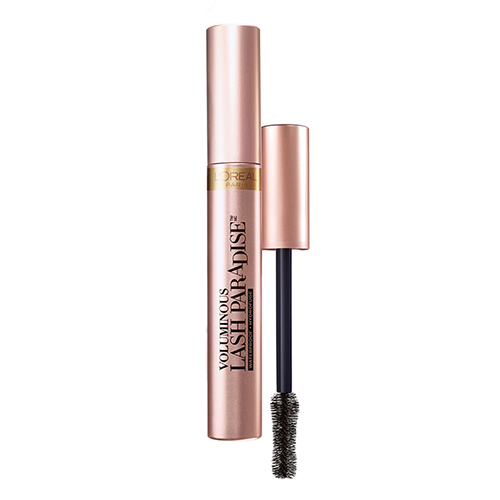
L'Oreal Paris Lash Paradise Mascara
If you have the tendency to rub your eyes out (note: excessive rubbing causes breakage of capillaries, resulting in fine lines and wrinkles to develop faster), give the smudge-proof mascara a go.
Its waterproof formula is well-loved by the beauty community and we’re definitely in love with its affordable price too.
Retails for S$22.90. There’s an ongoing promotion at the time of writing, so click on the link to see latest price.
How to apply mascara
First, curl your lashes. The shu uemura eyelash curler (S$30) has a cult-following and is said to work exceptionally well for Asian eyes. Hold the curler at the base of your lash line and hold in place for a few seconds, repeat two to three more times before coating on your favourite mascara.
TIP! You should never swipe on a wand-full of product directly onto lashes as this will surely lead to clumping. What you should do instead is smear off any excess mascara caught on the wand before lightly wiggling it from the base of your lashes! This ensures an even coating that can be easily built-upon.
We rounded up some of the most mind-blowing eyelash tips that you’d find useful.
Step 5: Brows
Last but not least, work on your brows. This is a very important step because a perfect set of arches means having a well-framed face with everything kept in balance.
Grooming them on the regular aids in the filling in process when it comes to doing your makeup. It’s easy to tweeze or shave your brows right from home but if you’d rather have them professional shaped, do check out all the great deals over in our Salon Finder section. Let the professionals know what kind of look you’re going for and they’re sure to deliver without you needing to go through all the trouble.
How to do your brows
Check out this beginner’s guide to drawing eyebrows for a step-by-step tutorial. As a good rule of thumb, brows shouldn’t extend past the line between the edge of your nose and the outer corner of your eye. More about the golden ratio to be found in the guide!
Steps for full-face makeup on lips
No look is complete without the perfect pout. Although we might be donning masks now and well into the near-future, it never hurts to feel fancy and luxurious in glossy lipsticks or lip tints.
Step 1: Exfoliate lips
First things first, it’s crucial to exfoliate your lips for a smooth glide-on and an optimal colour impact. Exfoliating ensures all itty-bitty flakes of dry skin that come between you and your most kissable look are removed.

Dior Lip Sugar Scrub
For a gentle scrub that nourishes and gives colour at the same time, try this luxurious product. This moisturising stick contains grains of sugar that melt away for a no-rinse treatment any time of the day. Say hello to soft supply skin that glow along with the rest of your look.
Retails for S$50. Click on the link below to check for latest promotions.
Step 2: Lip Liner
Despite having a notorious reputation for creating dramatic over-lined lips, lip liners are actually useful if you want to rock a glam lip all night.
Acting as primers to boost the longevity of your lipstick, they define and shape your lips, allowing for the creation of subtle shadows that enlarge them at the same time.
It’s recommended that you use a lip liner when picking out bold reds, nudes, and deep plum shades as these can prevent the colours from bleeding during the day.
Keep the undertone of your lip liner as close to that on your lip stick for a uniformed look.

Huda Beauty Lip Contour 2.0 Lip Liner
This lip pencil glides on like butter and delivers a velvety matte finish you’d love.
The lip liner is said to last for nine hours and has a transfer- and water-proof formula to keep your lip look intact all day.
Available in 12 shades and retails for S$32. Click on the link below to check for promotions.
How to apply lip liner
To apply, simply glide the liner along the edges of your lips to create an outline before filling them in with lipstick.
TIP! Picking a shade darker than your lip colour of choice emanates an alluring vibe and adds fullness to lips.
To further plump up your pluckers, start with the cupid’s bow and just slightly line outside of it. Bring the line back down to connect with the inner corners of your natural lip line for a complete upper lip.
For beginners, it’s not recommended you over-line the bottom lip as more detail and attention is needed.
After the lip is lined, proceed to fill the outline in with any lipstick or lipgloss.
Lip colour
Have a quick look at this cheat sheet for a complete overview of the type of finish you should get!
- For a natural tint: Sheer lipsticks like the Origins Blooming Sheer Lip Balm (S$34) work best
- For a long-lasting look with hints of shimmer: Opt for a cream lipstick like the NARS Cream Lipstick (S$40)
- For an ultra-glossy lip that shines: The Fenty Beauty Gloss Bomb Universal Lip Luminizer (S$33) is sure to turn heads
- For a subtle K-beauty look: A light Vivid Cotton Ink (S$15) lip stain from innisfree will do the trick
- For a brightly pigmented and smudge-proof wear – matte lips are your go-to, check out the Charlotte Tilbury Matte Revolution Lipstick (S$50)
How to apply lip colour
Start from the centre, and carefully work your way around the corners. Use a lip brush for greater precision if you’d like! The Zoeva 330 Lip Contour (S$19) gives crisp edges and a flawless, even application.
To blend your lip liner into your lip colour better, use your finger tip or brush to run across the outline.